in After Effects
What you will create
Hyper cinematic 3D tunnel with volumetric lighting and depth of field — final result
An advanced breakdown of After Effects' cinematic capabilities, built around a tunnel scene constructed entirely from shape layers in 3D space. The tutorial covers a 3D floor, a repeating rectangular tunnel, a wide-angle dolly camera push, environment lighting with cast shadows, volumetric god-rays from Gradient Ramp and CC Radial Fast Blur, animated point lights driven by wiggle expressions, and a final depth-of-field pass using Camera Lens Blur. This free After Effects tutorial is designed for motion designers in Malaysia who want to master advanced cinematic 3D techniques including volumetric lighting, god-rays, and depth of field.
What you will learn
Adobe After Effects 2022 or later. Basic knowledge of 3D layers, cameras, and the Timeline.
1. Go to Layer › New › Solid. Choose a medium gray color and make it comp-sized. Create a duplicate (Ctrl+D) — you will need two copies. Enable the 3D cube icon (F4) on one of the duplicates to make it a 3D layer.
2. The non-rotated solid serves as the backdrop/sky layer. Together they create a complete environment — a sky above and a ground plane below.

New Solid created — ready to configure as the 3D floor with X rotation and scale
3. Create a shape layer with a rectangle (press Q, draw a tall narrow rectangle). Enable it as a 3D layer and slide it to the left side of the composition.
4. Open a Two View layout with a Top view: right-click the Composition panel → New Viewer, set the second panel's camera dropdown to Top.
5. In the Top view, duplicate the rectangle (Ctrl+D) and push it back by 300 Z-position units. Repeat for as many copies as you want. Vary the Y position of each to create a city-block height variation — taller and shorter columns create visual interest.

Two-panel layout — Active Camera (left) and Top view (right) for Z-space positioning
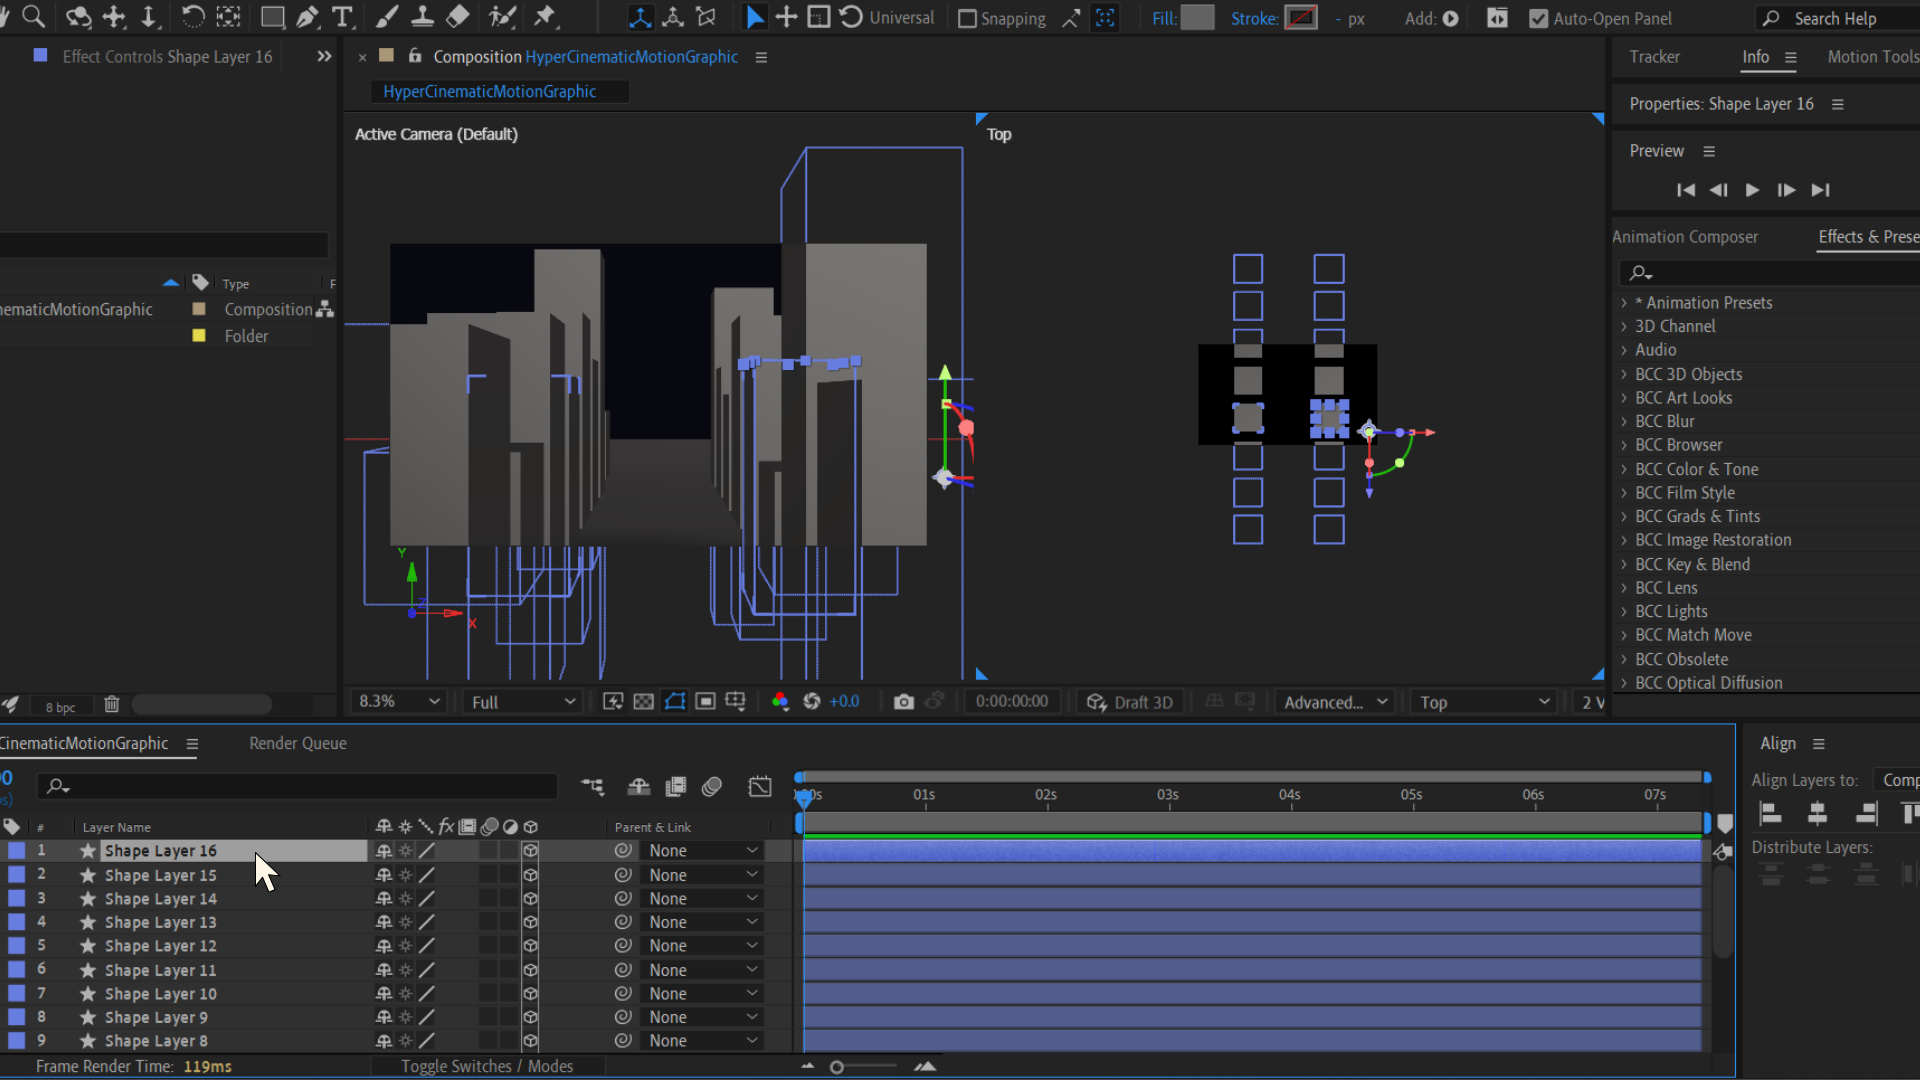
Shapes duplicated with 300 Z-unit spacing — Top view shows the depth layout clearly
6. Select all your column layers and press Ctrl+D to duplicate the entire set. Move the duplicates to the opposite side of the composition — you now have two parallel rows of towers, forming the walls of a tunnel.
7. Select all elements, then open Layer menu › Transform and adjust their Z-position collectively to center the scene for optimal camera framing. This is optional but helps with the initial camera placement.
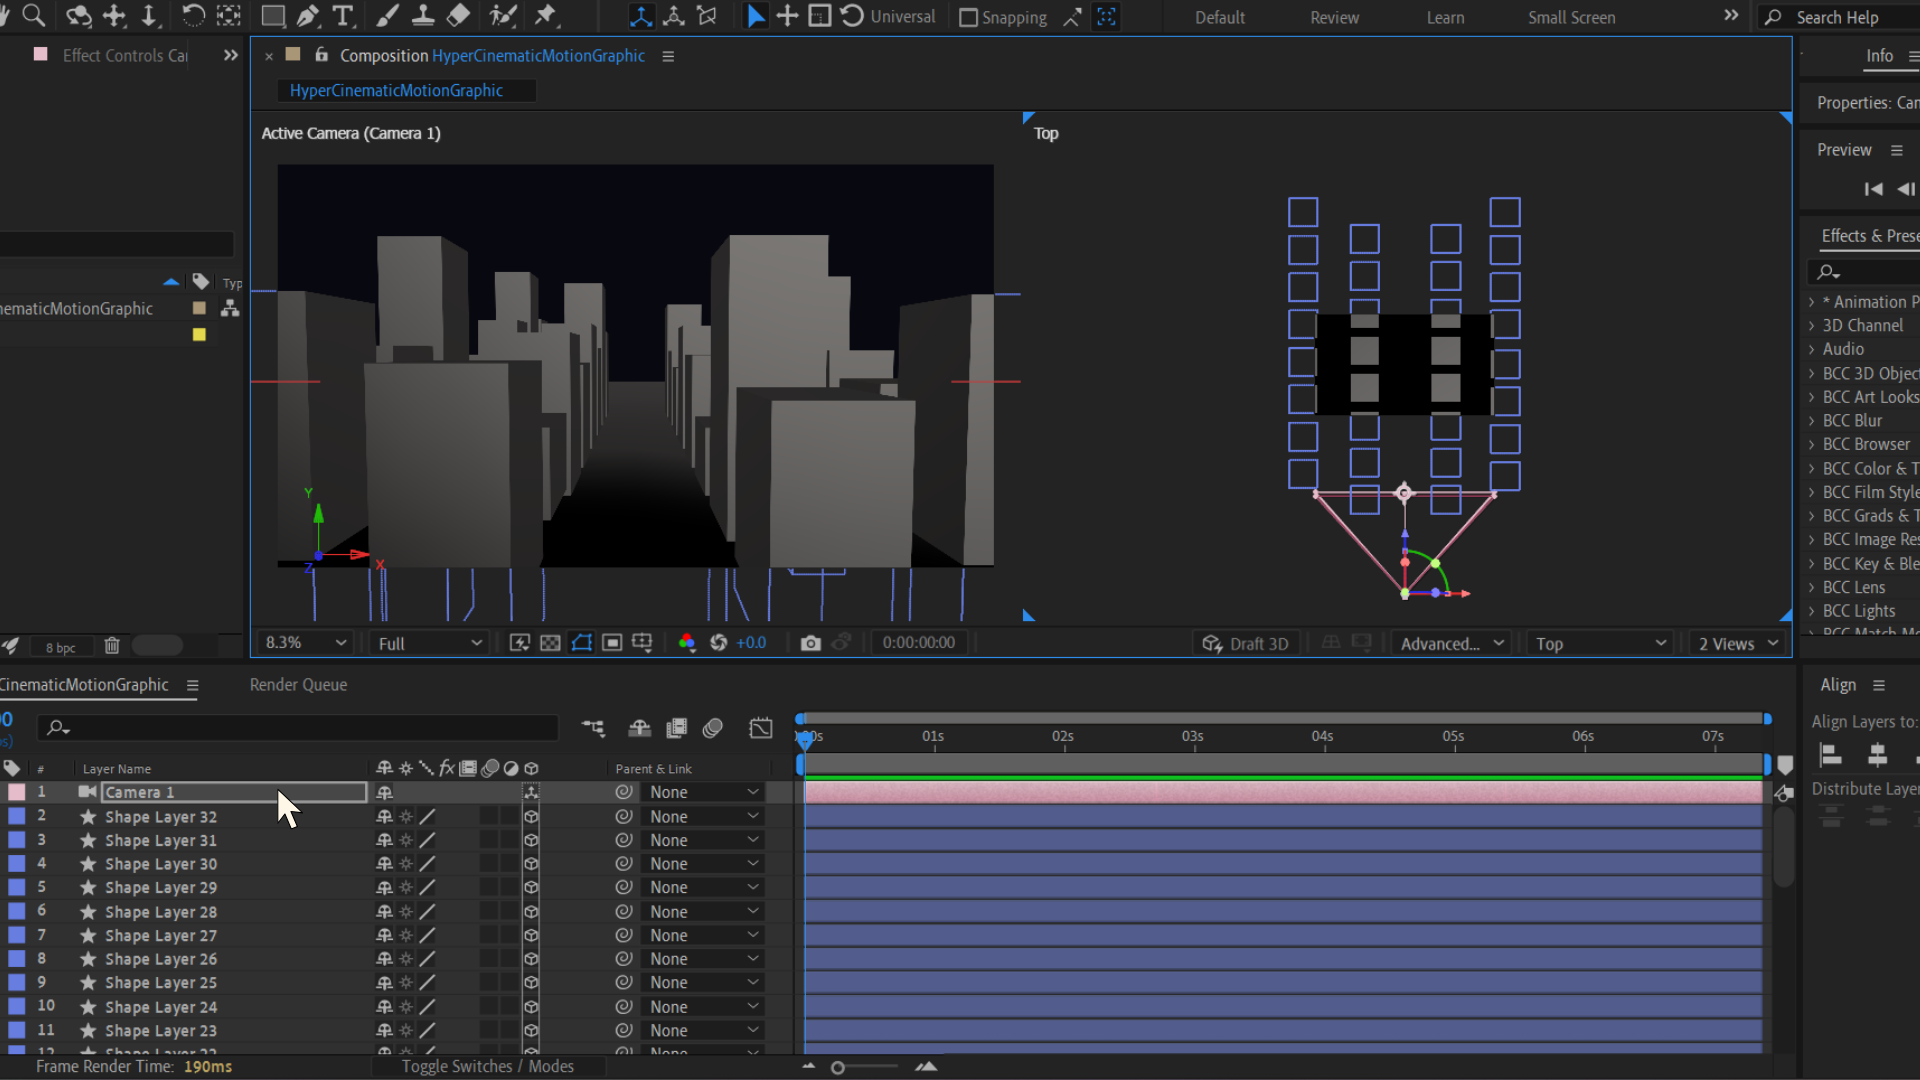
Full tunnel — two rows of towers with varied heights and Z-spacing of 300 units each
8. Go to Layer › New › Camera. For a vast, epic feeling, choose the 20 mm preset — the widest standard preset, which dramatically expands the apparent scale of your scene.
9. Click OK. Then select the Dolly Towards Cursor Tool (hold C until you reach it, or look for it in the toolbar) and dolly backward to your desired starting position.
10. After Effects creates the end keyframes automatically. This simple dolly creates a dramatic pull-into-the-scene effect.
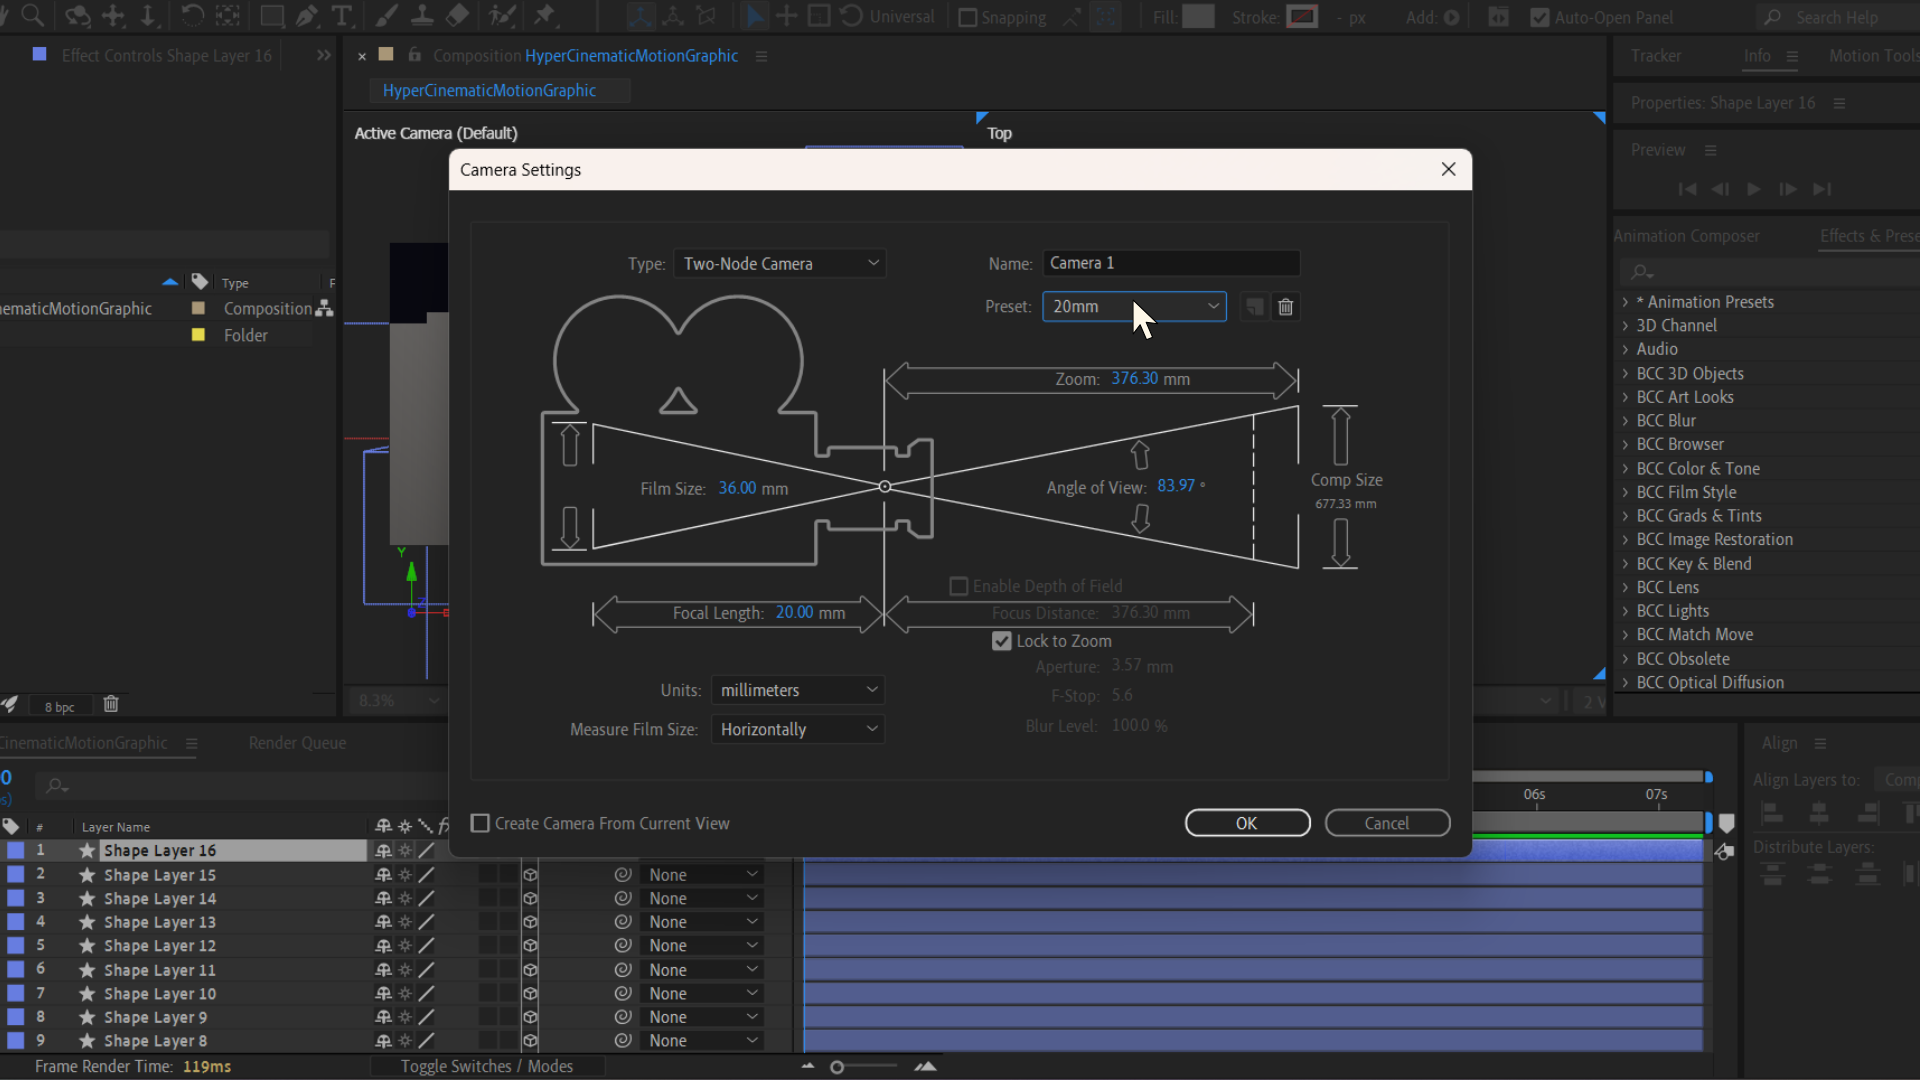
20 mm camera settings — wide angle makes the scene feel vast and cinematic

Camera positioned in the tunnel — ready for the dolly animation keyframes
11. Add more visual depth by filling the scene. Duplicate some tower layers and push them to the sides (adjust X position). Increase their Y position to make the side towers appear even taller, visible from the camera angle. Place some graphics further back in Z space and scale them up — creating background structures.

Additional 3D shapes positioned — camera view for verifying element placement in depth
12. Go to Layer › New › Light, choose Environment light type and enable Cast Shadows. This transforms the scene from flat shapes into a properly lit 3D environment. Adjust the light's rotation to vary the shadowing direction.
13. To keep your computer from overheating during iteration, click Draft 3D in the Composition panel, then open Renderer Options and reduce:

Environment Light dialog — Cast Shadows enabled, ready to transform the flat scene into 3D
14. Select your background/sky layer. Apply Effect › Generate › Gradient Ramp:
15. Now create a new Adjustment Layer (Layer › New › Adjustment Layer). Apply Effect › Blur & Sharpen › CC Radial Fast Blur:
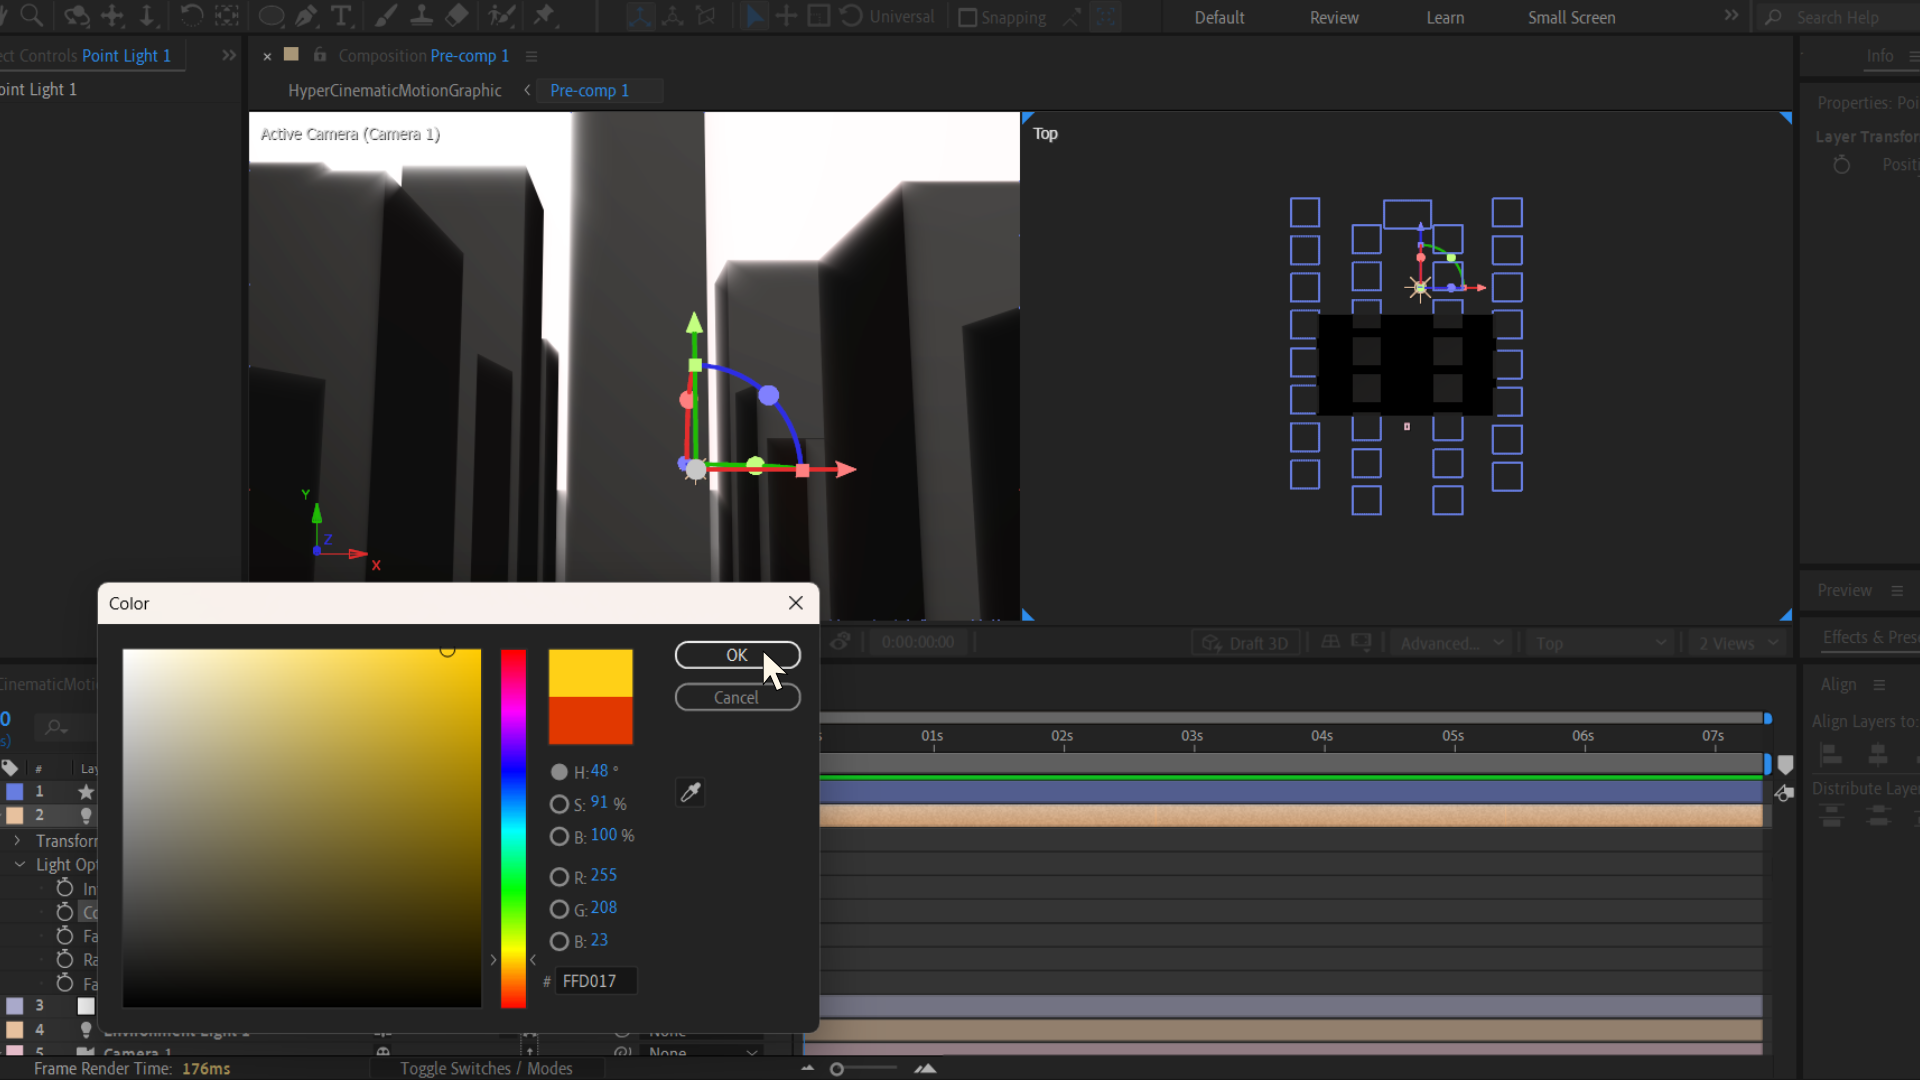
Warm color palette — choose two mildly warm colors for the Gradient Ramp on the sky layer
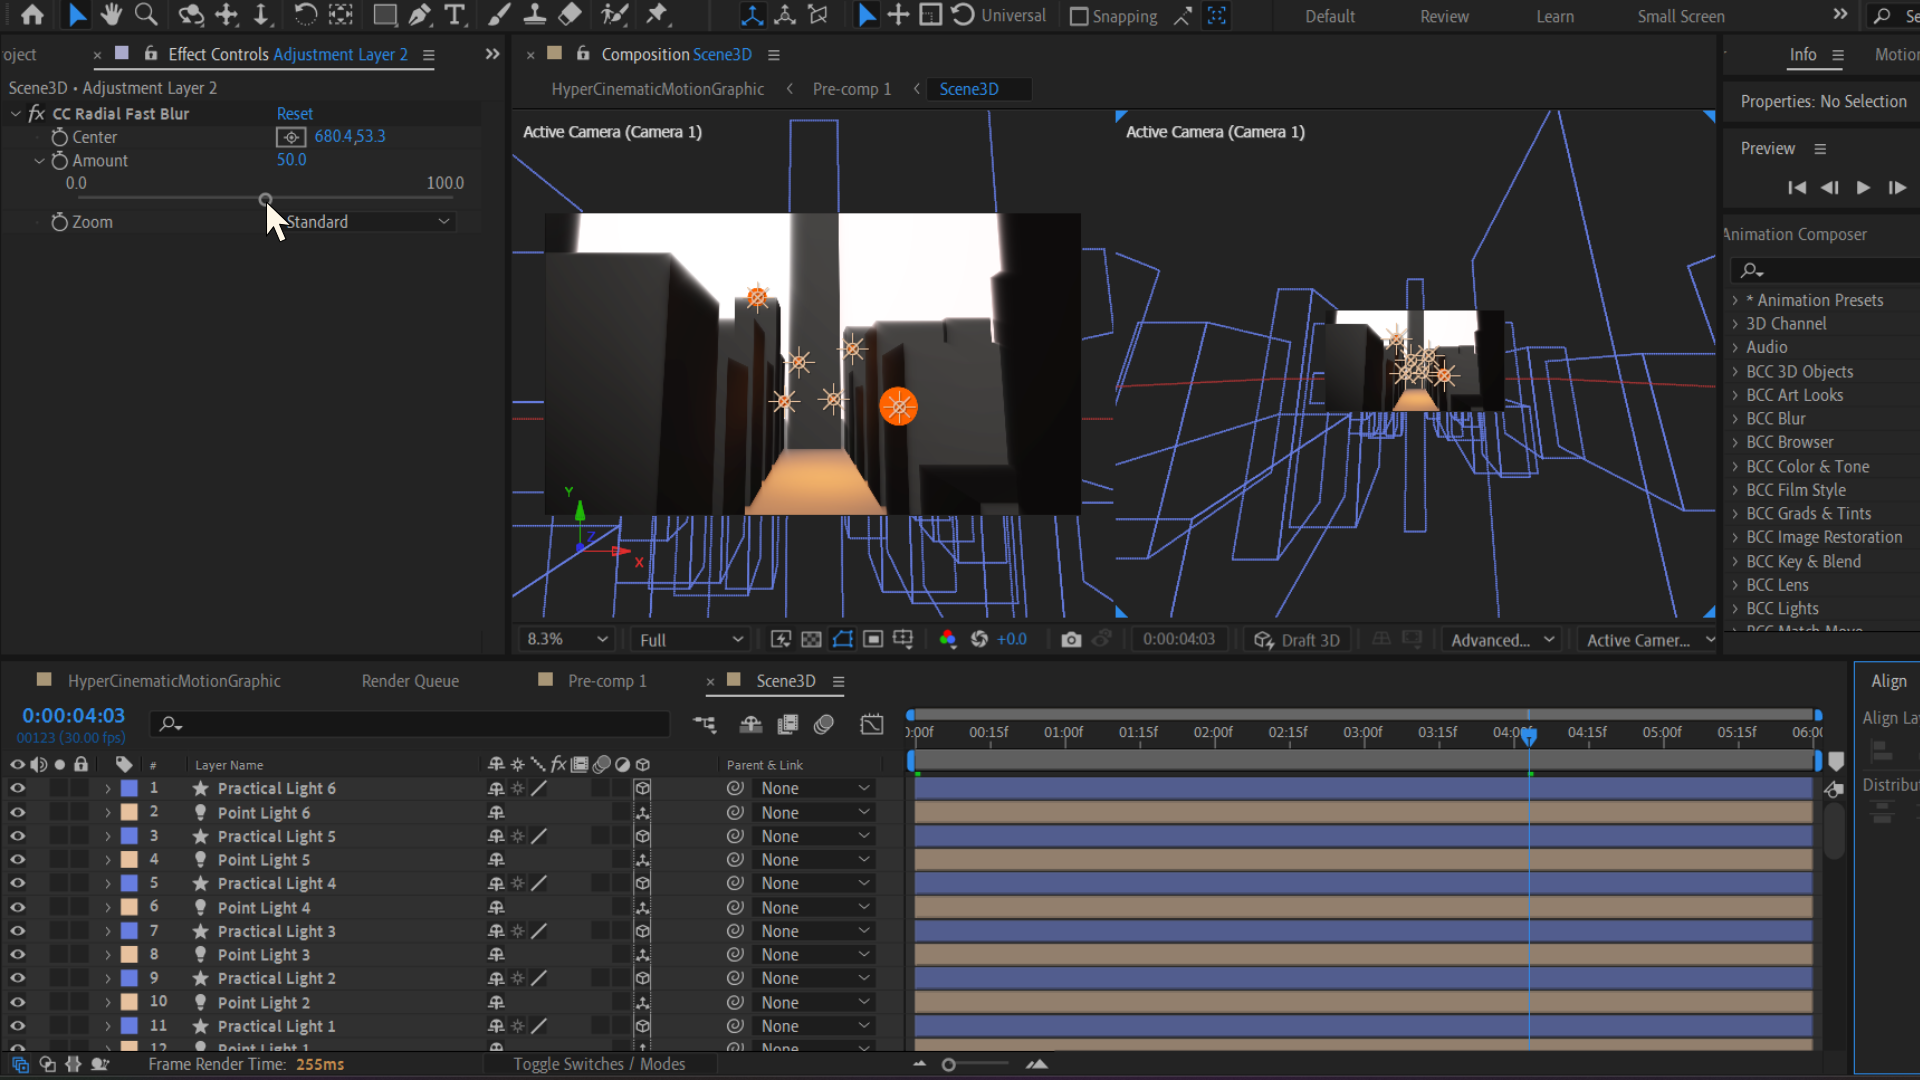
CC Radial Fast Blur on adjustment layer — Amount creates the god-ray streaks
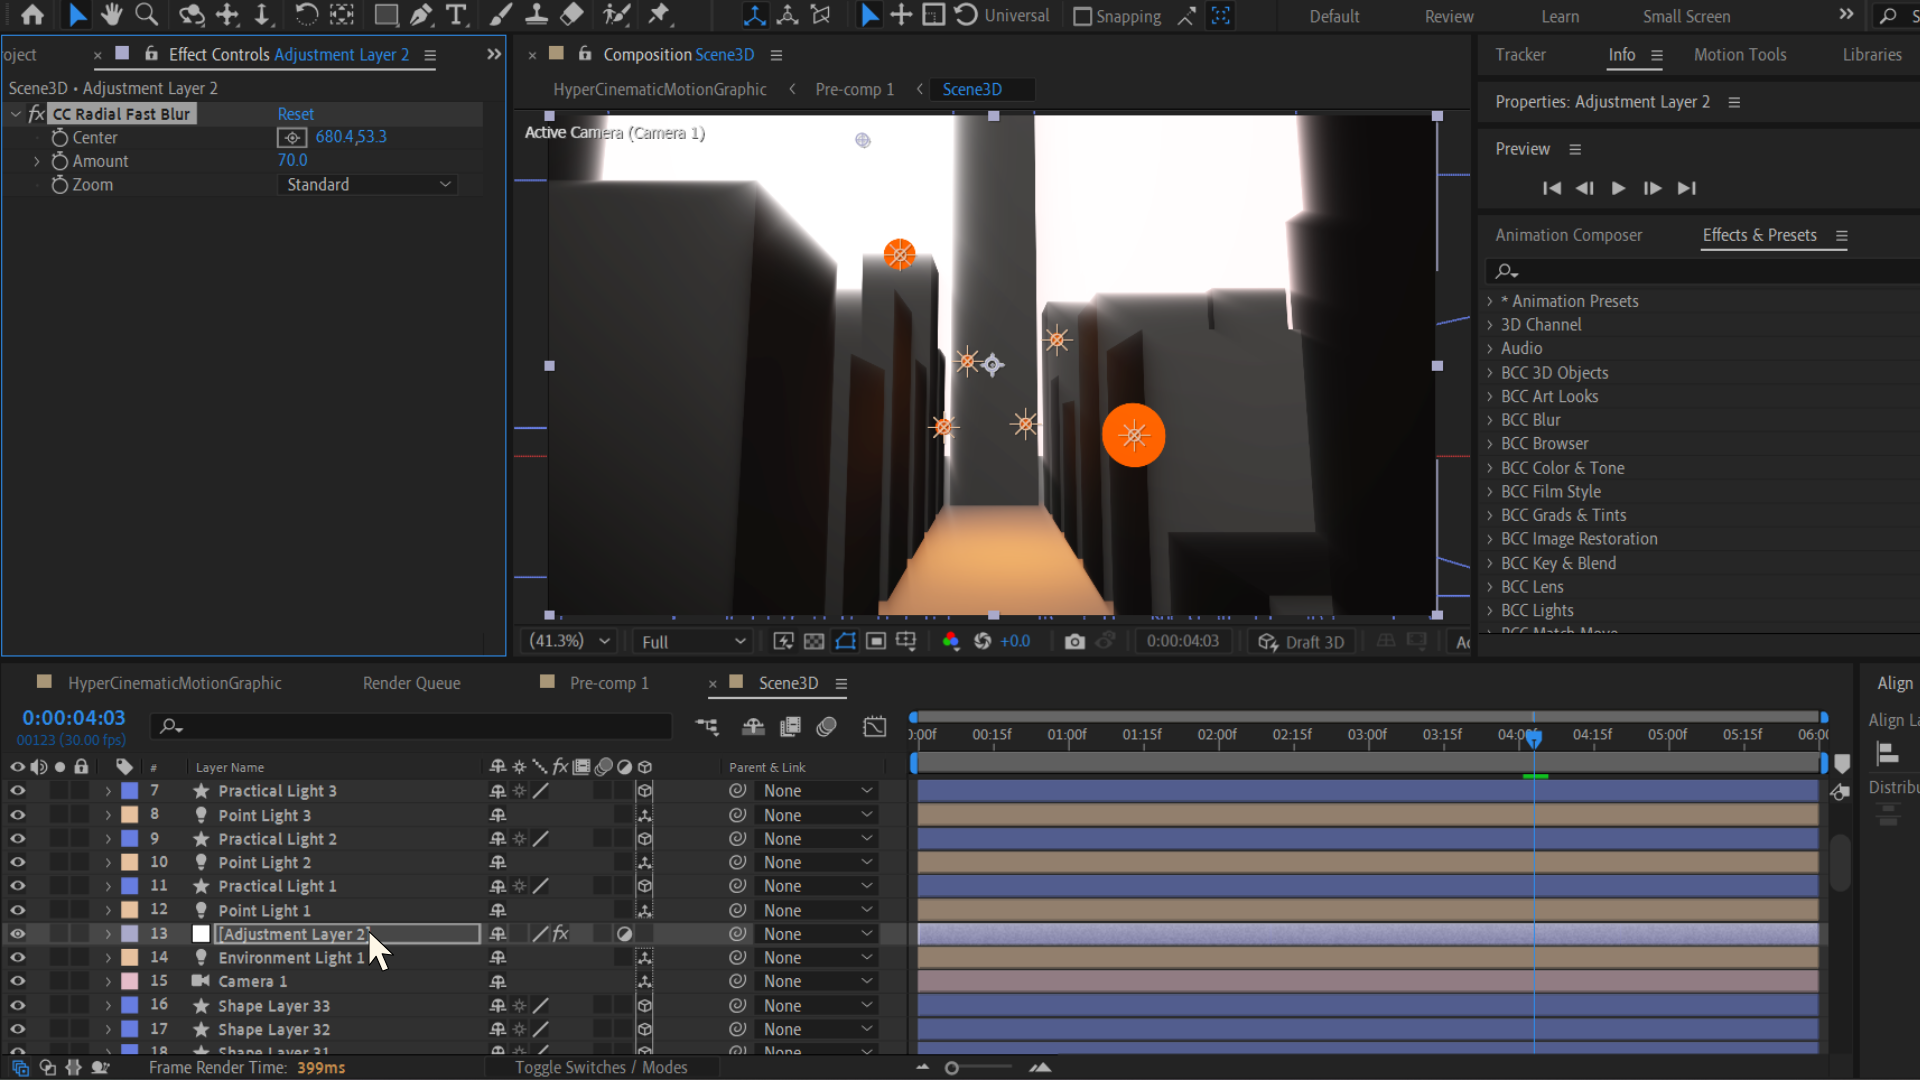
Adjustment layer set to Screen blend mode — rays now blend beautifully into the scene
16. Add a dramatic accent light: Layer › New › Light, choose Point. Set its color to something bold like red or warm amber. Configure it to contain the spill:
17. Make it a practical light — create a very small circle shape layer in the same color as the light. Enable it as a 3D layer and expand its Material Options, setting Accepts Lights to Off (so it always shows its own color, unaffected by scene lighting).
18. Alt-click the Position stopwatch of the circle and type thisComp.layer("Point Light 1").transform.position to parent its position to the light — keeping the visible dot locked to the light source.

Point light with Smooth fall-off — Light Options configured for intense color accent lighting

Practical light circles visible in the tunnel — orange shapes parented to point lights
19. Add a wiggle expression to the light's Position property (Alt-click the stopwatch, type wiggle(2, 30)) for a subtle, organic flicker. Duplicate the light + circle pair and push duplicates to different Z positions for a string of lights down the tunnel.
20. Select all your 3D layers and go to Layer › Pre-compose. Name it something memorable (e.g. "Scene_3D"). This flattens the 3D scene into a single 2D layer while preserving its Z-depth information through a 3D channel.
21. With the pre-comp layer selected, apply Effect › 3D Channel › 3D Channel Extract. In the Effect Controls:
22. The resulting grayscale map shows: black = foreground (in focus) and white = background (out of focus). You will use this as the blur map in the next step.

All 3D layers in the Timeline — ready to be pre-composed into a single layer

3D Channel Extract — Depth channel showing the Z-depth grayscale map
23. Duplicate the pre-comp layer. On the duplicate, delete the 3D Channel Extract effect. Apply Effect › Blur & Sharpen › Camera-Lens Blur:
24. The Camera-Lens Blur uses the depth map grayscale values to determine blur strength per pixel: white areas (distant objects) get maximum blur, black areas (close objects) stay sharp. The result is a realistic lens-based depth of field.
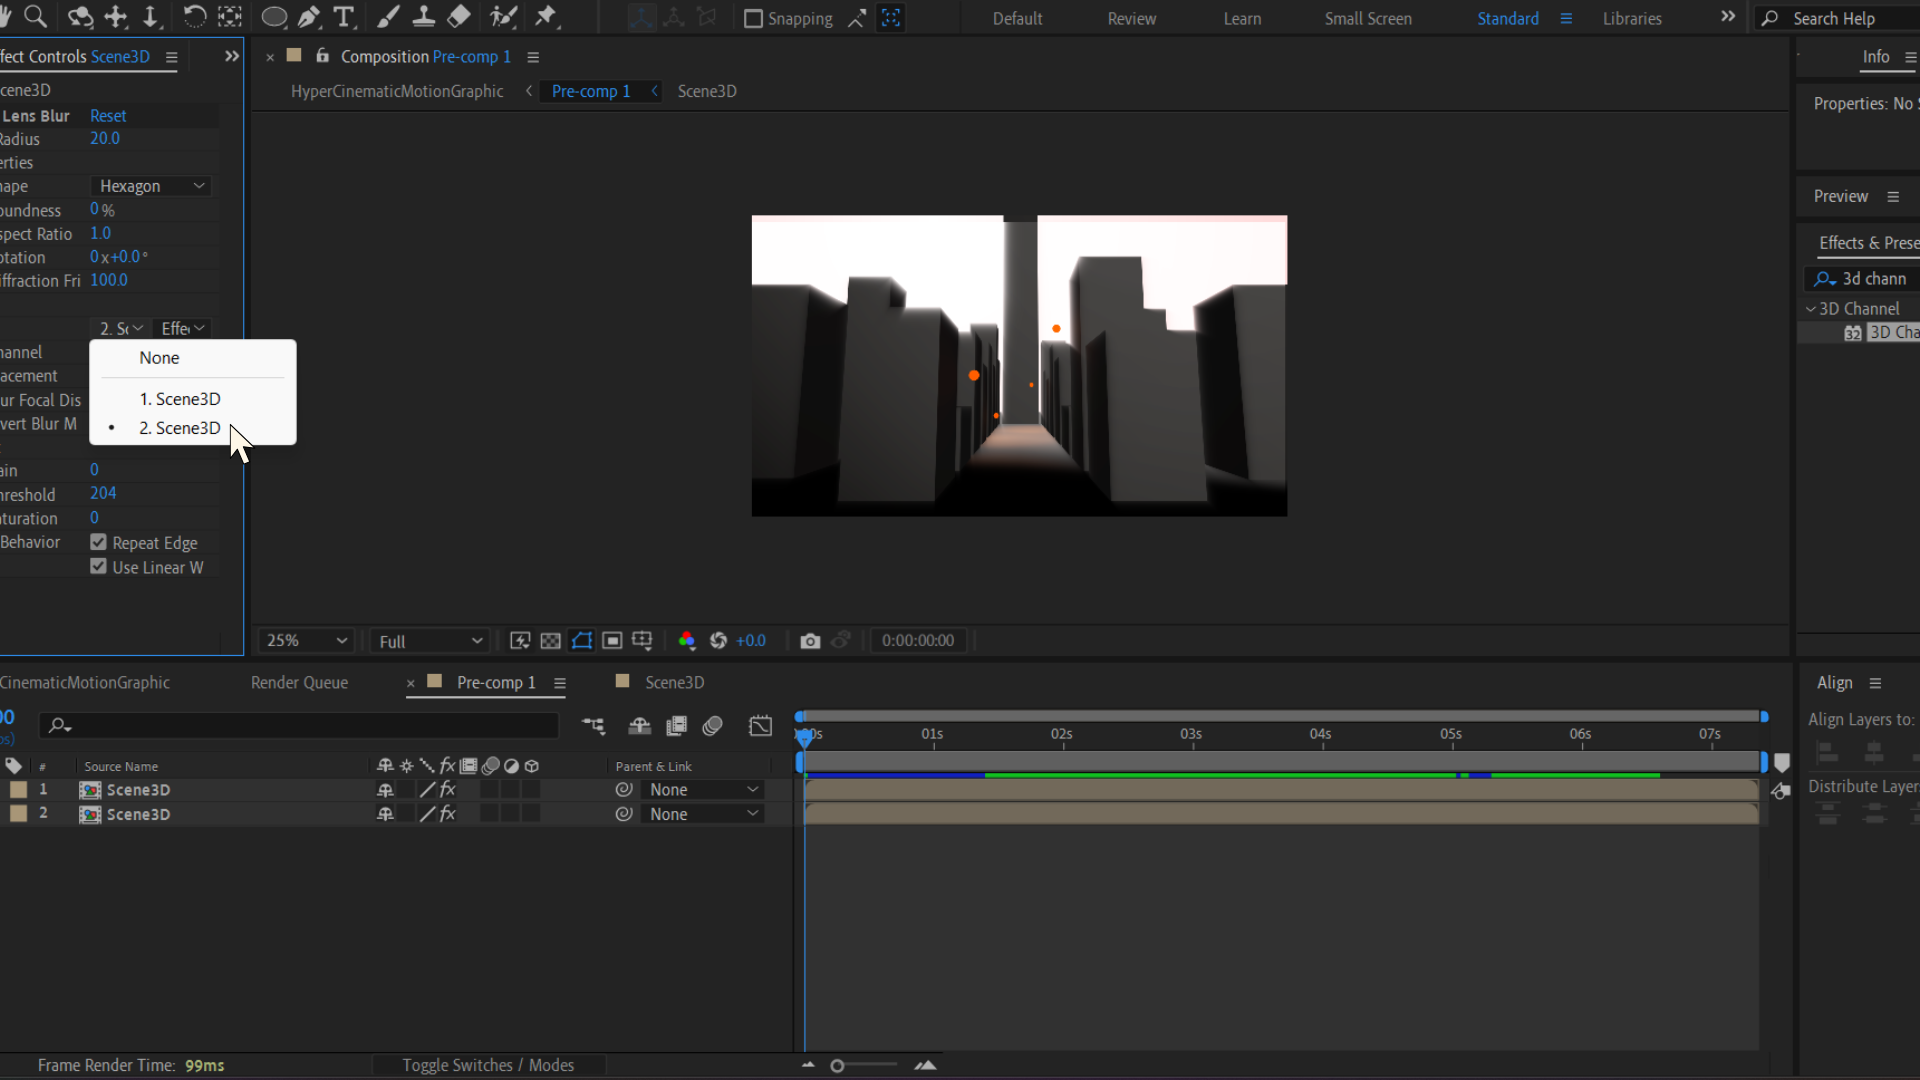
Camera-Lens Blur with depth map — foreground sharp, background progressively blurred
25. Add one final Adjustment Layer at the top of the Timeline. Apply these optional finishing effects in order:
26. Add more 3D objects, try different light colors, or experiment with the camera path for a completely different look. The core pipeline remains the same — this is a reusable framework for cinematic 3D scene-building in After Effects.
| Key / Shortcut | Action |
|---|---|
| Q | Shape / Rectangle Tool |
| F4 | Toggle Switches / Modes (show 3D cube icon) |
| R | Reveal Rotation property |
| S | Reveal Scale property |
| P | Reveal Position property |
| C | Cycle Camera Tools (Orbit, Track, Dolly) |
| Ctrl+D | Duplicate selected layer(s) |
| Alt + click stopwatch | Open expression field |
| F9 | Apply Easy Ease to selected keyframes |
| U | Reveal all keyframed / expression properties |
| Spacebar | Play / Stop preview |
| 0 (numpad) | RAM Preview |

